 Many of 2 wheelers (Motor cycles) we drive in India comes with speedometer. But isn’t it cool idea to have speedometer to your bicycle also.
There are many digital speedometer are available now. These also comes with many functions , like Speed, top speed , trip meter , average speed etc..
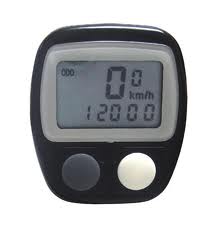
Very basic instrument that I am using comes with following features which I feel sufficient for hobbyist.
Ø SPD - Current Speed of bicycle
Ø ODO - ODOMeter (Total Distance)
Ø DST - Trip Distance
Ø MXS - Maximum Speed
Ø AVS- Average Speed
Ø TM - Elapsed Time
Ø RPM - Rotation per minute
Ø CLK - Clock (12H/24H)
Ø SCAN - (Icon)
Ø "Up" / "Down" Comparator (Down arrow shows speed less that average speed and vice varsa for up)
Ø Setting Speed Scale (km/h,m/h)
Ø Setting Tire Circumference (60CM-229CM) : This is primary setting you need to do while installing speedometer. Feed the circumference of bicycle wheel.
Ø Setting the last value of ODOMeter
Ø Auto On/Off
Ø Auto On/Off

Installation:
On ordering or by purchasing you will get one speedometer, magnet, sensor, and battery and instruction manual.
Installation is very easy:
Step 1: Put the battery inside computer and close the lid, observe the lid it contains small rubber washer to it. This will provide somewhat resistance to water.
Step 2: Input the circumference of your wheel for my MTB it’s 209. Here left button of computer work as mode and right button works as counter just like you set any digital watch.
Step 3: Set as per your requirement Miles/Hr or Km/Hr I prefer Km/Hr as it’s very common in India.
Step 4: Set current time in 24 hour format or in 12 hour
Your computer setting is done! Now sensor.
Step 5: Take the magnet and fit it to spoke of wheel facing to fork of the cycle.
Step 6: Fit the sensor to the fork as such that it will face to magnet attached to spoke. Make sure that distance between the magnet and sensor is 2-3 millimeters only.
Step 7: Attach computer on holder of sensor, Check any speed recording you are getting on computer by moving wheel forward and backward, if not readjust the sensor and magnet until you get some reading on computer.
Step 8: If you are getting some reading then it’s time to fix the computer on handlebar and take real test drive! Cheers!!
Step 9: Validate the accuracy. Easy way to do this try to cover same distance from your bicycle and motorcycle and by car. If the distance mismatches adjust circumference accordingly. (You will have to remove and re-install the battery to do this.)
The bicycle computer attaches to the mounting shoe by sliding the unit it snaps firmly into position. So you can easily unplug it and keep it with you if park your cycle somewhere.